This happened somewhere around January of 2022.
For this post I’m going to talk about a project that I decided to do over winter break. I noticed that the wooden portion of our patio/porch (portico?) was fairly beaten down and weathered. The wood looked like it was splintered and was prickly to the touch. I figured this made the house look a bit worn down. It feels as though there wasn’t really much care put into it putting the patio together, other than just getting it up. However, it was a great excuse for me to get a sander and spend time doing something that actually produced an end product, a nice weather tolerant portico.
I used a small hand sander and got to work. Sanded down the columns, as well as any wood that I could get to. After I was finished sanding I also had to pick a stain to use. There are plenty of stains to choose from, but I opted for a slow drying stain, which gives the stain time to penetrate into the wood. The bonus was that this stain was a two in one sealer as well. I’ve helped my parents out sanding and staining a fence in the past, but we had to stain and then apply another coat on top to seal it against insects and the weather. Another issue that I learned from the fence staining project was that the sun destroys everything. After a few years, the coat that was put on the wood would crack and flake off. This meant that we had to re-do everything, except this time the fence was already in place. Needless to say, I wanted to avoid this issue again which is why I opted for the two in one stain and seal. I believe that is usually used to stain decks. The stain color was Tahoma Brown semi-transparent (Architect series, whatever this means haha), and the brand of stain was Preserva Wood.

Picture of the Stain Can
On a side note, I remember seeing a video of a person who often works with wood. They explained that although wood that is sanded at a fine grit may feel and look nice, the stain has a hard time being absorbed by the wood due to the wood dust logged into the pores of the wood. That’s why they recommended not to use a very fine grit when sanding the wood.
That being said, here are a few pictures of the project and how it turned out. The pictures from top to bottom: before, after sanding, and after staining.
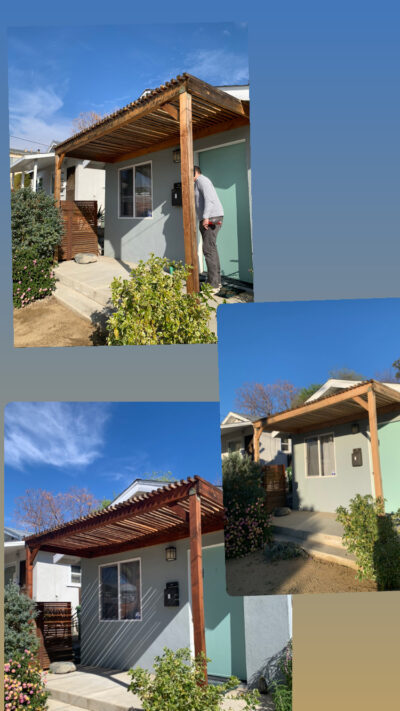
Then here’s a picture after I finished the project.
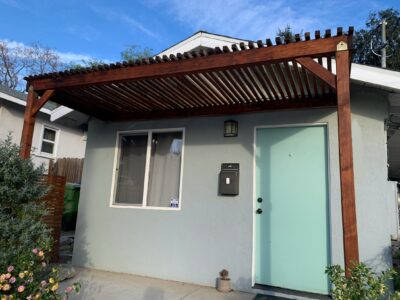
As of now though, it’s been in the elements for some time. So the wood has faded a bit compared to when it was first dyed. I’ll probably need to go back and apply another coat soon. Between staining the wood and now, I also added panels on to the top. The reason we decided to add the panels was to create cover from the rain, as well as shield the front from the summer sun. Although it may seem insignificant, we felt as though the room at the front of the house became a lot cooler after adding panels. I’ll save that process for another post though.
Hope you enjoyed the post! Let me know if you have any questions 😁
Thanks for reading!


